Showing posts with label sewing. Show all posts

Making More Christmas Presents


I have only one excuse for not posting much lately… genealogy!


I’ve been researching my husband’s family tree- Love!  This would of course be my dream job… researching family trees and getting paid for it ;)


Anyway, when I drag myself away from the census for a few minutes ;) I have been working on Christmas presents.


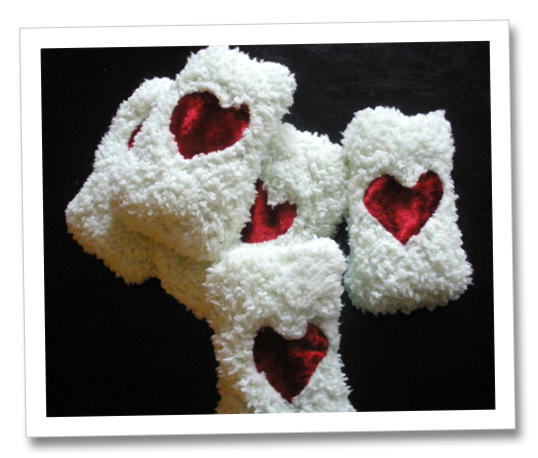
I made The Creative Crate’s cute mini hand-warmers – so easy!

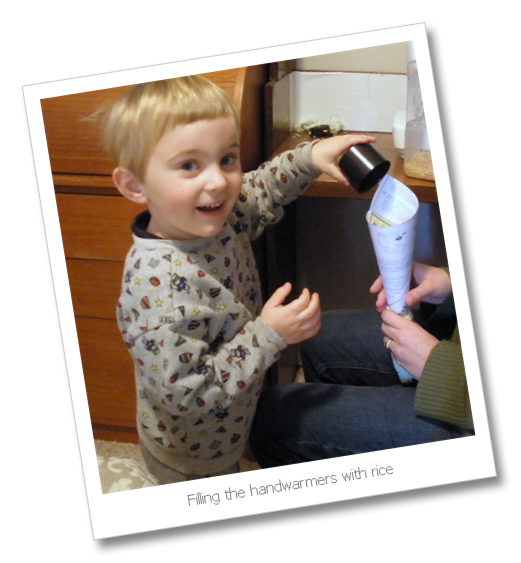
She gives a fabulous how-to, with pictures, and even with my poor sewing skills, I made 5 in under 2 hours (with Bamm-Bamm helping me!)

I also used some of the fuzzy green fabric left-over from Little Man’s Quilt, which is harder to sew but also hides a multitude of sins.

The red velvet comes from a too-tight dress I bought at the thrift store (before the kiddos came along), and it was time to say goodbye (to the dress and the figure I have been missing for years now ;)

Anyway… I love them!  I think 5 are not enough. I gots lots a nieces and nephews who would love these!

New to Pregnant with power tools? Don't miss a post and subscribe here or


Bookmark and Share

Nursery Bedding: Crib Quilt

I finally finished making a crib quilt for my new bundle of joy!

I followed the instructions from this site, but will not go into detail here...

because I am no quilter ladies and gentlemen!  Quilts are hard (but it could be I didn't follow directions well *blush*).  OK hard for me...  I should try again, I think I'll do it better next time (and follow the directions)!

I would hate for anyone to follow my "instructions" on this one.  I have in the past believed that you can learn anything from the web, but if I try quilting again, I will certainly seek out a little hands-on help from someone who knows what they're doing!

Anywho, here's a picture - it looks great, but then again, you can't see the flaws if I don't show them to you, right?  


Either way, the quilt is functional and warm!!


Do you think maybe I should make one for Bamm-Bamm too? Bookmark and Share

Nursery Bedding: Crib Bumper

Oooohhh… this was a tough project… but don’t let that stop you from making your own!  It got easier with practice!

It’s a vertical split crib bumper – the fabric panels sit next to each other.  Brown strips line up with the tie locations.

P4130018

Bookmark and Share

Nursery Bedding: Crib Skirt with Inverted Box Pleats

I made a crib skirt with inverted box pleats in a contrasting color!

P4060025
 As the second sewing project for the nursery, this was a little harder than the panel curtains I made.

I also only made a partial skirt – just for those parts of the crib that are seen.

Here’s a brief tutorial:

Bookmark and Share

Nursery Bedding: Curtains

First thing to do: make curtains

They are also the easiest thing to make (you don't even have to sew if you don't want!!  See: The Nester's "Window Mis-treatments" for GREAT ideas!)

I also want my thrift store valance to tie in a little with the fabrics I bought at Joann's.

1.  Add a layer of brown to the bottom of the valance
This wasn't so hard (for a first project).
Not easy, but not super hard either!
a.  Sew a long strip of brown fabric, hemmed at sides, top and bottom

b.  Sew onto valance
under the ruffle (but not all the way through to the front - the toile covers the seams for the striped fabric and the brown)  This is hard to describe. but nonetheless there was a place to sew on the brown without the seam being seen from the front.

 This thrift store valance is pretty nice - lined and everything!


That was easy!


Think I can sew a pair of plain 'ol panel curtains too?

2.  Plain 'ol panel curtains

There's lots of plans on the nets for panel curtains too, so you don have to use mine :)

Materials:
  • sewing machine (borrowed from MOM)
  • thread
  • tape measure
  • iron and ironing board
  • 2 pieces fabric cut to length and width of desired curtain (plus 8 inches for seams and curtain rod pocket - I used *very* wide seams since this was my first sewing project since I was 15!)
  ** Always wash and iron fabric before sewing (this prevents shrinkage later on and helps seams lie flat)

Basic seams along sides and bottom
a.  Fold fabric over an inch and then another inch.  Iron flat and pin.
b.  Sew along the fold ½ inch from the edge.  Iron again if you want.


Curtain rod pocket
a.  Fold top an inch and then another inch.  Iron.
b.  Fold top down 3 more inches. Iron and pin.
c.  Sew along bottom of fold, ½ inch from edge.
d.  Sew along top of fold, 1 inch from top.


OK!  Great first project.  Definitely got my feet wet!

I also added a thin strip of brown fabric along the bottom.
I just cut, folded, and sewed seams for the brown fabric.
Then I placed the two pieces together (fronts facing each other) and sewed them together above the original seams!

It looks even better in real life!

Bookmark and Share

Delicious-ness: Nursery Bedding

Who doesn't spend hours on the internets drooling over nursery bedding?

What?  You don't.  Why not!

It's only yummy enough to eat.

I've been looking for the perfect soft green toile nursery bedding to go with the cute curtains I got at the thrift store... no I do not have the patience to wait and find more thrift store bedding... for a crib... in that color... in toile.  It just won't happen.  Aaaand I'm due in 4 weeks!

So I hunted for inspiration on the world wide web.

Bookmark and Share

Making Your Own Fabric "Ribbon"

I'm using a dark brown fabric to add some dramatic contrast to my green toile nursery bedding.  I even added a strip of it to my thrift store valance.

I want to make my own ribbons to hang my canvas nursery letters!
There might be a better way to do this (I can only call them "ribbons" in good conscience), but I am only a novice sewer... ewww... ummm... seamstress!
I figured the easiest DIY ribbon would simply be a wider version of a fabric tie (like the kind made for chair pads).


Bookmark and Share
Related Posts with Thumbnails