Inspiration: Built-In Bookcase


I’m so excited to start seeing my built-in bookcase start coming together finally.

When you love libraries and books as much as I do, you need one of these – I’m so excited to be getting more storage – now I can buy more books (laughs maniacally)!

I still have a lot to do, but I thought I might share some of my inspirations for this project with you!

Grandiose

Unusual

Unpainted

Painted


Tall ceilings

Behind a seating arrangement

Around a door

With a ladder


Lined up with chair rail

With Doors

Photo Sources:

Kenneth Jay Lane’s New York City Library,   EverydayMinimalist, BerkeleyMills, JAWoodworking, CocoCozy, unknown, Decorpad,  Paloma81.blogspot.com, ComfortandLuxury.blogspot.com, HouseandHome, 709oakhall, unknown

Hope you enjoyed!


New to Pregnant with power tools? Don't miss a post and subscribe here... Bookmark and Share

DIY by Your Lonesome: Tips for the Solo Do-It-Yourselfer

These tips aren’t for DIY house building – I don’t have any experience with that ;), but rather those tasks many of us women and beginner DIYer may tackle in the course of fixing up and decorating our homes.

Things like building furniture, installing cabinets, wainscoting and molding, painting, and hanging chandeliers or fans.

Safety

Have a cell phone on you (on your body!) in case you get hurt working alone.  Let someone know what you are doing and agree to call in periodically (every 2 hours or so).  Make sure you both understand what should be done if the call is overdue (such as having them check in on you).

You should always wear and use personal protective equipment (goggles, face mask, gloves, hair tied back), but this is especially true when you are alone – reduce your risk of getting hurt as much as possible.

Use safe work practices. Do not remove the blade guard from your saw.  Have an emergency safety off switch for your table saw.  Turn off your tools when making adjustments.   I will post more on power tool safety for beginners in a future post.

If you are using a particularly dangerous power tool (like a table saw or nail gun) it is not advisable to work alone. I also do not do electrical work, or work at heights alone ever.  I am often doing the work myself, but am not by myself… my husband and kids are usually within earshot.

Large, Ungainly and Heavy Items

When working with sheet goods (a 3/4” MDF panel can weight over 80 pounds), I am especially in need of that extra pair of hands – particularly if they are strong.

When I need to work with this heavy material alone, I try to break it down into more manageable pieces.  Get the sheet cut to the sizes you need or roughly a little bigger for finish cutting at home.  I get the guys at my hardware store to cut my MDF into 4 12” wide boards, 8’ long.  This works great for my bookcase – I take the boards home (now only 20 pounds each and easy to carry), and rip them to the 11” width and whatever height that I want.  

If you don’t want to have your large sheet of plywood or MDF cut in the store, there are special-purpose tools that you can buy to help you out.  These are great for moving some things, but not a piano, by yourself.  But be careful not to overextend yourself.  Getting help is better than getting hurt.

Moving

Use clamps on the edge of your plywood, MDF or particle board.  They are much easier to grasp than the edge of the board.  Together with a panel carry handle, I can move a medium weight sheet of plywood or beadboard by myself.

Use a handtruck or dolly to move your large item.  Below is a dolly specifically made for moving sheet goods.

For those who will frequently move heavy panels of plywood or install drywall by themselves, a good investment is a panel lift hoist.

Panel Dolly Panel Carry Handle Panel Lift Hoist

Measuring

The end of the tape measure can be clamped into place when you don’t have a helper to hold it for you.

A folding ruler, or a metal or wooden measuring stick are better when clamping your measuring tape in place is not an option.  They are easier to use on walls, ceilings or open spaces, and make useful straightedges too.  You can even make your own. For other difficult applications or for making your own measuring tape, try adhesive measuring tape.

Finally, if you have the moolah for it, a laser measuring device is the coolest toy in the sandbox.

P9230031
Measuring Stick My Vintage Folding Ruler Adhesive Measuring Tape Laser Measure

Cutting

A roller stand in front of a table saw makes it easier to feed longer pieces of wood across the saw when working alone.  These vary in price from tens to hundreds of dollars.  An outfeed setup is important for those large sheet goods also.  These can also be bought.

I use a simple homemade table resting on adjustable height sawhorses to hold long boards or sheets of MDF prior and during cutting, and a store-bought folding table to catch the saw’s outfeed.  The only problem here is that the wood doesn’t easily roll on the infeed side, but I may build a simple attachment with rolling PVC pipe to solve that problem.

  P8150040
Roller Stand Outfeed Attachment My In- and Out-feed Tables

Assembly and Fastening

Clamps
There are lots of different kids of clamps.  They can help hold a project together for you, giving you plenty of time to fasten it with nails or screws.  I love my quick-clamp bar clamps, they slide quickly to adjust, much faster than turning the bolt on a C-clamp, and are tightened with a squeeze.  

Even if you don’t work alone, it is in your best interest to become familiar with the variety of useful clamps available to the beginner DIYer.


Toolbelt
Another must-have for the solo DIYer is a tool belt.  For example, when you are holding a French cleat board against the wall (in order to hang a headboard or cabinet), you just need to grab your drill from the tool belt holster, drill your pilot hole, put the drill back, grab a nail and your hammer (again from the tool belt) and fasten that board in place. 

If you are building with nails and don’t need or want to drill pilot holes, start your nail before you pick up the board. 

Nail Guns and Screw Guns
Or invest in a quality pneumatic nail gun (they can be operated with one hand) that will shoot multiple nail sizes.  The screw gun is the comparable device for auto-feeding screws from a clip to screw items together one-handed.

Quick Clamp Screw Gun Toolbelt

Holding in Place

Don’t underestimate the power of sawhorses (especially with the additional help of clamps and vises) for helping you hold your projects in place while you work.

Here’s a cool trick to use when installing crown molding by yourself.  Use a nail in the wall near the ceiling to help hold the far end of your molding in place while you attach the near end.  When you are done, just remove and fill the nail hole.

Of course, you can also buy and use some of the new products available to help with this (see below).
Crown Molding Clips slip easily on and off of a nail hidden behind the molding
Little Green Suckers suction to the wall to hold up your molding (requires air compressor) 3rd Hand adjustable jack and brace for molding, cabinets, plastic sheeting, ceiling materials, flooring…

Another tool that will support a cabinet or light fixture while you work, is a “3rd Hand”, basically an adjustable jack, brace, or clamp.  Make sure you get one that will be able to support the weight of your item, as they usually support up to 70 pounds.  These can also be used to hold down flooring while the glue dries, or holding up a makeshift plastic tent while spray painting.  One of these can help with crown molding, but a few 2x4s would work too.

Finally, if you want or need to do “major construction” work alone, the resource for you is Working Alone by John Carroll.


Anyone out there regularly do DIY by themselves?  Got any pointers?


New to Pregnant with power tools? Don't miss a post and subscribe here... Bookmark and Share

Cool Tools: Wood Screws


Most commonly used fastener for attaching wood to wood, but are also used for attaching hardware, and hinges.


Vocabulary

head: the top of the screw that allows it to be turned or driven.

shank: the body of the screw, the cylindrical portion from under the head to the tip.  May be entirely or partially threaded.

thread: the ridge wrapping around the shank of the screw that does the work of fastening the screw to the material.


Wood screws generally have a short section of unthreaded shank below the head.

Screws vary by length, head type and shape, and gauge.  The majority are tightened with a clockwise rotation.


Head Shape

round: for attaching thin materials to wood.

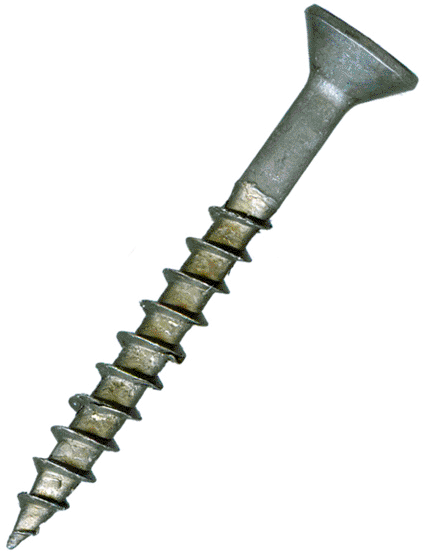
flat (also called countersunk): fit well in tapered recesses like the holes in hinges.

oval (also called raised): a little of both flat and round, tapered bottom; slightly rounded top.

pan or truss: a large flat head with a flat bottom like a round head.

trim : like a flat head but smaller, so they are less visible.

Those screws whose heads have a tapered bottom (flat and raised head) are designed to be countersunk, driven below the surface of the material to effectively hide the screw when covered over with wood putty or caulk.

Head or Recess Type

slotted (or flat-head) and phillips (or cross-head) are the most common standard recess types.

square-head (robertsons) and square-head phillips (a combination of phillips and square-head): these two grip and resist stripping better than the standard screw head types. 

Because the bit grips the head so much better, making it easier to fasten with and less likely to , I prefer using a square-head screw whenever possible, but they are harder to find.  Square drive bits also last longer.

mshead

Gauges

larger gauge = thicker screw

#6 (slightly thicker than 1/8”) to #12 (slightly thinner than 1/4”).  These will be labeled with the size and the thread count per inch, #8-32, for example. 

1/4” and larger are typically listed by their size in inches.


Using Screws

  • Some are coated (which may stain your wood).  Use stainless steel or galvanized screws for outdoor projects.
  • When fastening two pieces of hardwood, predrill a pilot hole.
  • Use as long a screw as you can without poking through the back side of the connecting piece.
  • When using a flathead screw, use a screwdriver bit not wider than the screw head or you will mar your work.  A bit that is too narrow may strip your screw head.

If you will screw into hard woods, use a quality Spax or premium screw – broken screws will only make you sad.

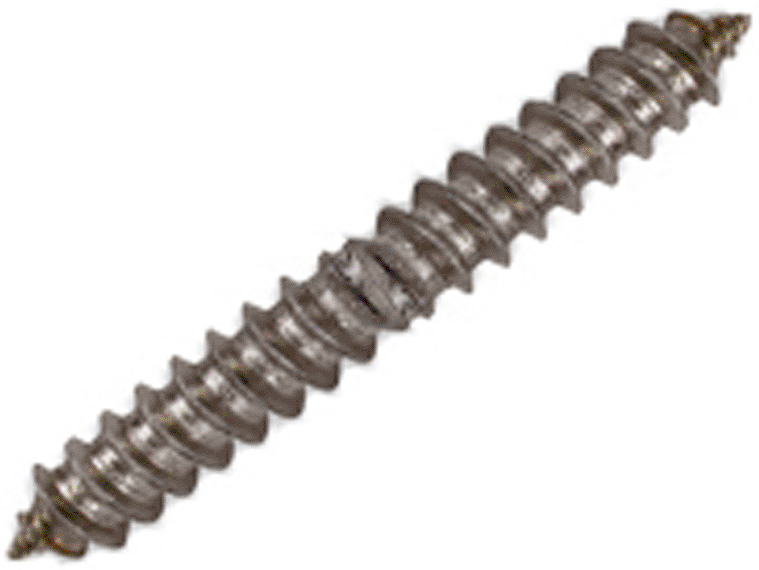
Dowel Screw: for attaching knobs, or connecting two wooden poles together.  There are special drivers for these, or you can use vice grips. 

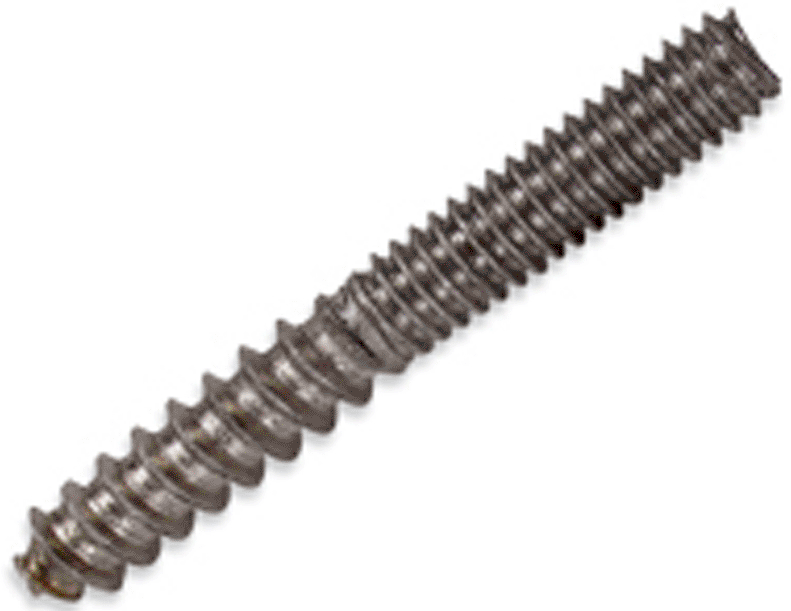
Hanger Bolt: also for attaching knobs, but also bun feet, and anything threaded.

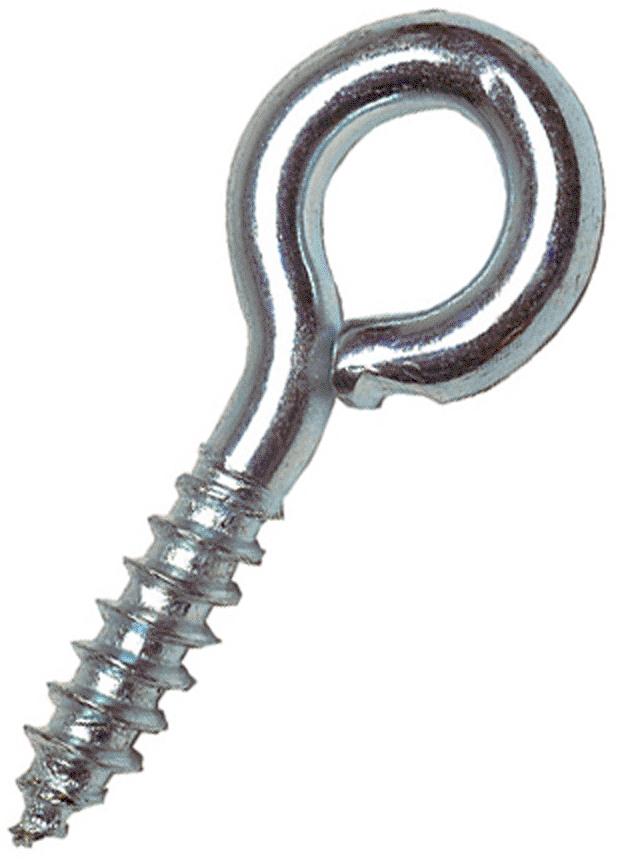
Eye Screw: open versions are called cup hooks.  Hang all sorts of stuff… what else can I say.


Tamperproof and tamper resistant screws

A special type of screw, used to prevent theft and tampering, with a very nonstandard head type that can only be screwed on and unscrewed with a special tool, designed specifically for the specialty screw head.

Decorative Screws


Made to look like old-fashioned wrought-iron nails, forged rivets, or any number of other attractive or unusual heads, these can take your project and add a special touch of antique, rustic or handcrafted to make it extra special and unique!  I want some of these :)


Confirmat Screws

A European-style, special tapered screw (requiring a special countersink drill bit for the pilot holes) is designed to create a very strong and stable joint between two pieces of MDF (medium density fibreboard) or particleboard.  I bought mine as part of a kit at McFeelys.


Another screw that will work well with MDF (and is less expensive than the Confirmat screws) is a coarse drywall screw.


How to Avoid Splitting Wood

Before screwing, drill a pilot hole.  That a hole drilled with a drill bit the same diameter as the shank, or body (minus the threads) of the screw.

** Try rubbing bar soap on the screw threads.  This will lubricate the screw going in, and can help reduce the chance of splitting.


Resources

10 Uses for Drywall Screws

Wood Screws

How to Avoid Splitting Wood on a Project


Future posts :

pocket screws and jigs

bolts

nails

miscellaneous fasteners

Ummm…. I would try to be funny about screws, but I don’t want to get in trouble with the search engines (and my mom ;)… so what do you… uh, fasten. 


New to Pregnant with power tools? Don't miss a post and subscribe here... Bookmark and Share

Built-In Bookcase: A Box Extender for My Outlet


My bookcases are being built on a wall with two existing outlets, which I would like to keep.  This is not a hard project, it just requires some power tools :) and…

a box extender which you can get at the hardware store.

A Box Extender fits over your current electrical box and “extends” it from as little as 1/8” up to 1-1/2”, so it is a must if you want to put in a new wall over an old one, or build in cabinets or bookcases.

Here’s how I did it:

Before you start, turn off the power to that outlet (and test that it is off).  I have a handy label inside my fuse box that lets me know what each of the switches controls.

1.  Measure.

Measure from neighboring cabinet or the wall, and the bookcase base or floor to the center of the outlet.  Then measure from the edges of the case and mark that spot on the cabinet back.

2. Cut your opening.

Move the case away from the wall, and cut or drill a small hole over your mark to check the accuracy.  If the hole lines up over the outlet when you put the case back, you can roughly enlarge the hole to half the width and height of your electrical box.

Do this with a Dremel Multi-Max, a jigsaw or reciprocating saw.

P9190056

Once the hole is larger, you can determine the precise cuts you want to make to exactly line up with the outlet, and mark or draw those lines on your cabinet before cutting.  Move the cabinet away again, make the cuts and re-check the alignment.

P9190054

3.  Remove the outlet from the electrical box.

This outlet looks like it is daisy-chained with the neighboring outlet, so it has 4 wires (plus the ground) attached to it.  Some outlets will only have 2 wires (and ground).  I moved the cabinet away again, and then I unscrewed all the wires going to the outlet, keeping careful track of which goes where, so I can put it back together safely.

P9190066 P9190068


4.  Install the box extender.

I moved my cabinet back in place again (for the last time, so I made sure you are ready to leave it there ;), and placed the box extender over the hole I cut and over the original electrical box.

P9190069

5.  Reattach the outlet.

Then I screwed the wires back onto the outlet, and screwed the outlet back into the electrical box and the extender.  The extender will come with extra long bolts to make this easier to do with the deeper box.   (However, if you need to buy longer bolts for this, the standard size for the bolts on electrical boxes is #6-32.) 

P9190075

6.  Reattach the cover.

If your cuts were a little too big, or you slipped and accidentally scratched or cut your backing (and paint won’t cover), you can buy an oversized outlet cover to hide your boo-boo. 

P9190077

Outlet covers come in multiple sizes. 

TaDa!

P9190078

Don’t forget to turn the power back on when you are done :)

Whatever you do, don’t just build your bookcase in front of the outlet, hiding it back there.   It is illegal and dangerous to place permanent furniture (cabinets, built-ins, etc) in front of an outlet blocking it.  They need to be accessible by electricians, inspectors, the fire department, future home owners.  Never permanently “hide” an electrical outlet where you can’t get to it.

It is easy to build your bookcase keeping the original outlets in place… just use a box extender!

I’m starting to get ready to finally finish these bookcases!  Yay!  I still have some posts coming up though, so stay tuned!


New to Pregnant with power tools? Don't miss a post and subscribe here... Bookmark and Share
Related Posts with Thumbnails