Showing posts with label tools. Show all posts

Can I Take a Rain Check


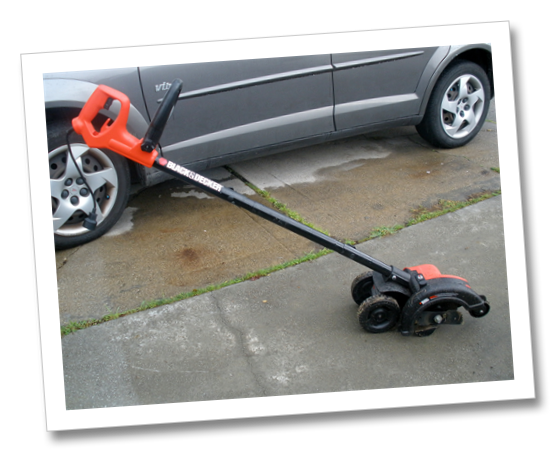
I got a new toy today.


A Black&Decker lawn edger.

I’m not normally a B&D fan, but the price was right.


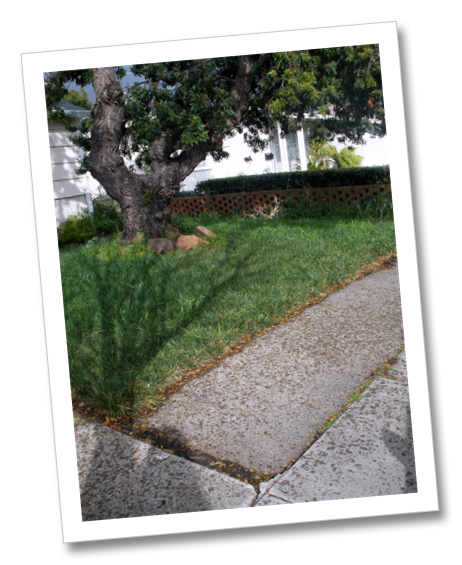
I can hear my neighbors cheering already (and thinking maybe now her front yard won’t look so decrepit!)

I got started right away - the sun was shining, and the baby (Little Man) was happily sitting in his high chair by the open front door watching me.


Perfect right?  Ummm, I guess I forgot to knock on wood!!


After the first pass along only one side of the walkway, it began to drizzle (what happened to my sun!)


Next thing I know, I’m caught in a sudden torrential downpour at the same instant Little Man begins a screaming wail that threatens to strip paint.


I packed away the tools and glanced back out at the lawn which had that hopeful look that said Please don’t leave me like this!

So… I didn’t get to spend much time with my new toy,

Little Man is screaming, and


it took 5 minutes before I realized…


I had stepped in dog crap.


New to Pregnant with power tools? Don't miss a post and subscribe here... Bookmark and Share

A Diaper for my Table Saw

From the sheer amount of time I spend with my table saw you would think it’s like my 3rd baby… and it’s as messy as one too.

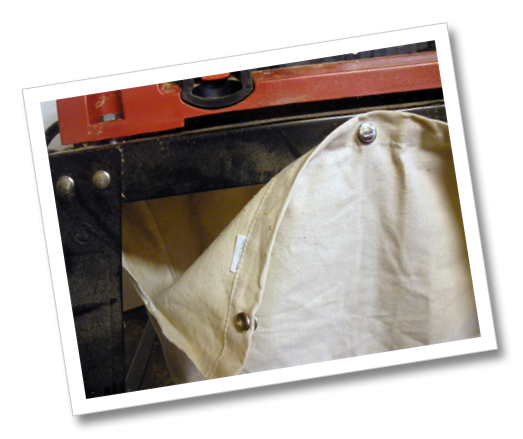
This li’l stinker needed a diaper (you might call it a dust bag).  Only $5.99 at Harbor Freight – my day is made!

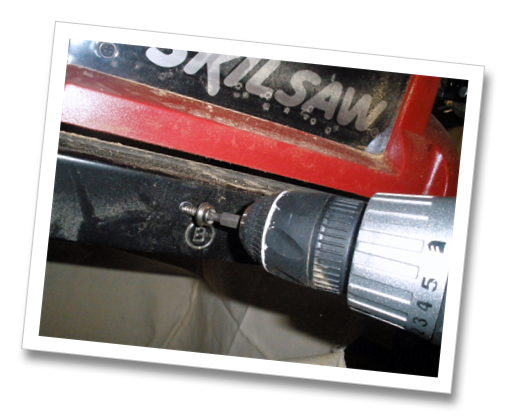
Drilled holes into the stand…

And screwed in the snaps.  Took me about 10 minutes total.

And now my much loved, used (and abused) table saw picks up after itself just a little better!  (Wish my boys did too)…

I’m still in the market for a small dust collection system, but until I scrape together the dough for that, I’ll have a (slightly) cleaner garage!!!

What do you think of my XLarge diaper? ;)

or my filthy little sweetheart?

New to Pregnant with power tools? Don't miss a post and subscribe here or

Bookmark and Share

DIY by Your Lonesome: Tips for the Solo Do-It-Yourselfer

These tips aren’t for DIY house building – I don’t have any experience with that ;), but rather those tasks many of us women and beginner DIYer may tackle in the course of fixing up and decorating our homes.

Things like building furniture, installing cabinets, wainscoting and molding, painting, and hanging chandeliers or fans.

Safety

Have a cell phone on you (on your body!) in case you get hurt working alone.  Let someone know what you are doing and agree to call in periodically (every 2 hours or so).  Make sure you both understand what should be done if the call is overdue (such as having them check in on you).

You should always wear and use personal protective equipment (goggles, face mask, gloves, hair tied back), but this is especially true when you are alone – reduce your risk of getting hurt as much as possible.

Use safe work practices. Do not remove the blade guard from your saw.  Have an emergency safety off switch for your table saw.  Turn off your tools when making adjustments.   I will post more on power tool safety for beginners in a future post.

If you are using a particularly dangerous power tool (like a table saw or nail gun) it is not advisable to work alone. I also do not do electrical work, or work at heights alone ever.  I am often doing the work myself, but am not by myself… my husband and kids are usually within earshot.

Large, Ungainly and Heavy Items

When working with sheet goods (a 3/4” MDF panel can weight over 80 pounds), I am especially in need of that extra pair of hands – particularly if they are strong.

When I need to work with this heavy material alone, I try to break it down into more manageable pieces.  Get the sheet cut to the sizes you need or roughly a little bigger for finish cutting at home.  I get the guys at my hardware store to cut my MDF into 4 12” wide boards, 8’ long.  This works great for my bookcase – I take the boards home (now only 20 pounds each and easy to carry), and rip them to the 11” width and whatever height that I want.  

If you don’t want to have your large sheet of plywood or MDF cut in the store, there are special-purpose tools that you can buy to help you out.  These are great for moving some things, but not a piano, by yourself.  But be careful not to overextend yourself.  Getting help is better than getting hurt.

Moving

Use clamps on the edge of your plywood, MDF or particle board.  They are much easier to grasp than the edge of the board.  Together with a panel carry handle, I can move a medium weight sheet of plywood or beadboard by myself.

Use a handtruck or dolly to move your large item.  Below is a dolly specifically made for moving sheet goods.

For those who will frequently move heavy panels of plywood or install drywall by themselves, a good investment is a panel lift hoist.

Panel Dolly Panel Carry Handle Panel Lift Hoist

Measuring

The end of the tape measure can be clamped into place when you don’t have a helper to hold it for you.

A folding ruler, or a metal or wooden measuring stick are better when clamping your measuring tape in place is not an option.  They are easier to use on walls, ceilings or open spaces, and make useful straightedges too.  You can even make your own. For other difficult applications or for making your own measuring tape, try adhesive measuring tape.

Finally, if you have the moolah for it, a laser measuring device is the coolest toy in the sandbox.

P9230031
Measuring Stick My Vintage Folding Ruler Adhesive Measuring Tape Laser Measure

Cutting

A roller stand in front of a table saw makes it easier to feed longer pieces of wood across the saw when working alone.  These vary in price from tens to hundreds of dollars.  An outfeed setup is important for those large sheet goods also.  These can also be bought.

I use a simple homemade table resting on adjustable height sawhorses to hold long boards or sheets of MDF prior and during cutting, and a store-bought folding table to catch the saw’s outfeed.  The only problem here is that the wood doesn’t easily roll on the infeed side, but I may build a simple attachment with rolling PVC pipe to solve that problem.

  P8150040
Roller Stand Outfeed Attachment My In- and Out-feed Tables

Assembly and Fastening

Clamps
There are lots of different kids of clamps.  They can help hold a project together for you, giving you plenty of time to fasten it with nails or screws.  I love my quick-clamp bar clamps, they slide quickly to adjust, much faster than turning the bolt on a C-clamp, and are tightened with a squeeze.  

Even if you don’t work alone, it is in your best interest to become familiar with the variety of useful clamps available to the beginner DIYer.


Toolbelt
Another must-have for the solo DIYer is a tool belt.  For example, when you are holding a French cleat board against the wall (in order to hang a headboard or cabinet), you just need to grab your drill from the tool belt holster, drill your pilot hole, put the drill back, grab a nail and your hammer (again from the tool belt) and fasten that board in place. 

If you are building with nails and don’t need or want to drill pilot holes, start your nail before you pick up the board. 

Nail Guns and Screw Guns
Or invest in a quality pneumatic nail gun (they can be operated with one hand) that will shoot multiple nail sizes.  The screw gun is the comparable device for auto-feeding screws from a clip to screw items together one-handed.

Quick Clamp Screw Gun Toolbelt

Holding in Place

Don’t underestimate the power of sawhorses (especially with the additional help of clamps and vises) for helping you hold your projects in place while you work.

Here’s a cool trick to use when installing crown molding by yourself.  Use a nail in the wall near the ceiling to help hold the far end of your molding in place while you attach the near end.  When you are done, just remove and fill the nail hole.

Of course, you can also buy and use some of the new products available to help with this (see below).
Crown Molding Clips slip easily on and off of a nail hidden behind the molding
Little Green Suckers suction to the wall to hold up your molding (requires air compressor) 3rd Hand adjustable jack and brace for molding, cabinets, plastic sheeting, ceiling materials, flooring…

Another tool that will support a cabinet or light fixture while you work, is a “3rd Hand”, basically an adjustable jack, brace, or clamp.  Make sure you get one that will be able to support the weight of your item, as they usually support up to 70 pounds.  These can also be used to hold down flooring while the glue dries, or holding up a makeshift plastic tent while spray painting.  One of these can help with crown molding, but a few 2x4s would work too.

Finally, if you want or need to do “major construction” work alone, the resource for you is Working Alone by John Carroll.


Anyone out there regularly do DIY by themselves?  Got any pointers?


New to Pregnant with power tools? Don't miss a post and subscribe here... Bookmark and Share

Cool Tools: Wood Screws


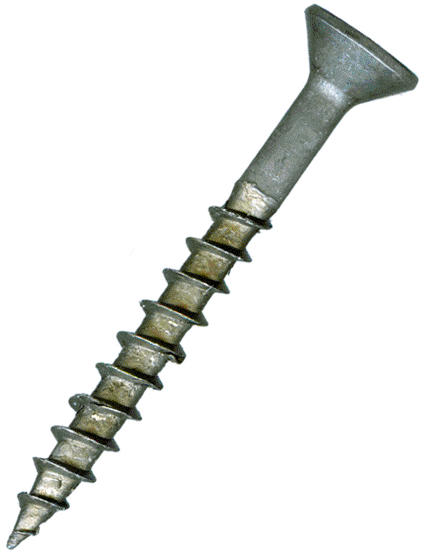
Most commonly used fastener for attaching wood to wood, but are also used for attaching hardware, and hinges.


Vocabulary

head: the top of the screw that allows it to be turned or driven.

shank: the body of the screw, the cylindrical portion from under the head to the tip.  May be entirely or partially threaded.

thread: the ridge wrapping around the shank of the screw that does the work of fastening the screw to the material.


Wood screws generally have a short section of unthreaded shank below the head.

Screws vary by length, head type and shape, and gauge.  The majority are tightened with a clockwise rotation.


Head Shape

round: for attaching thin materials to wood.

flat (also called countersunk): fit well in tapered recesses like the holes in hinges.

oval (also called raised): a little of both flat and round, tapered bottom; slightly rounded top.

pan or truss: a large flat head with a flat bottom like a round head.

trim : like a flat head but smaller, so they are less visible.

Those screws whose heads have a tapered bottom (flat and raised head) are designed to be countersunk, driven below the surface of the material to effectively hide the screw when covered over with wood putty or caulk.

Head or Recess Type

slotted (or flat-head) and phillips (or cross-head) are the most common standard recess types.

square-head (robertsons) and square-head phillips (a combination of phillips and square-head): these two grip and resist stripping better than the standard screw head types. 

Because the bit grips the head so much better, making it easier to fasten with and less likely to , I prefer using a square-head screw whenever possible, but they are harder to find.  Square drive bits also last longer.

mshead

Gauges

larger gauge = thicker screw

#6 (slightly thicker than 1/8”) to #12 (slightly thinner than 1/4”).  These will be labeled with the size and the thread count per inch, #8-32, for example. 

1/4” and larger are typically listed by their size in inches.


Using Screws

  • Some are coated (which may stain your wood).  Use stainless steel or galvanized screws for outdoor projects.
  • When fastening two pieces of hardwood, predrill a pilot hole.
  • Use as long a screw as you can without poking through the back side of the connecting piece.
  • When using a flathead screw, use a screwdriver bit not wider than the screw head or you will mar your work.  A bit that is too narrow may strip your screw head.

If you will screw into hard woods, use a quality Spax or premium screw – broken screws will only make you sad.

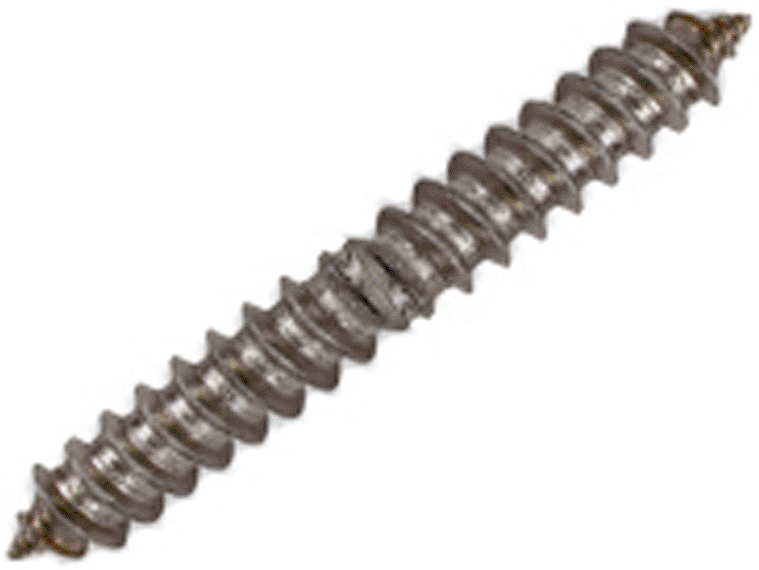
Dowel Screw: for attaching knobs, or connecting two wooden poles together.  There are special drivers for these, or you can use vice grips. 

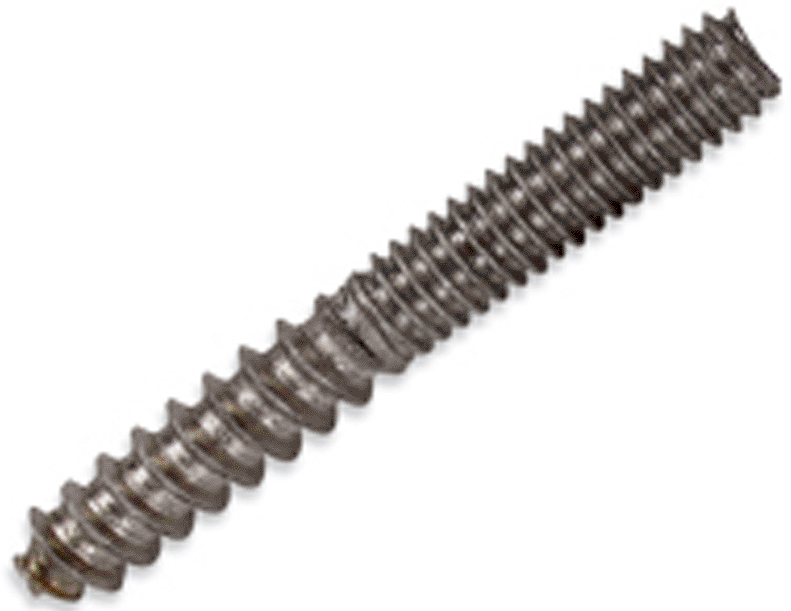
Hanger Bolt: also for attaching knobs, but also bun feet, and anything threaded.

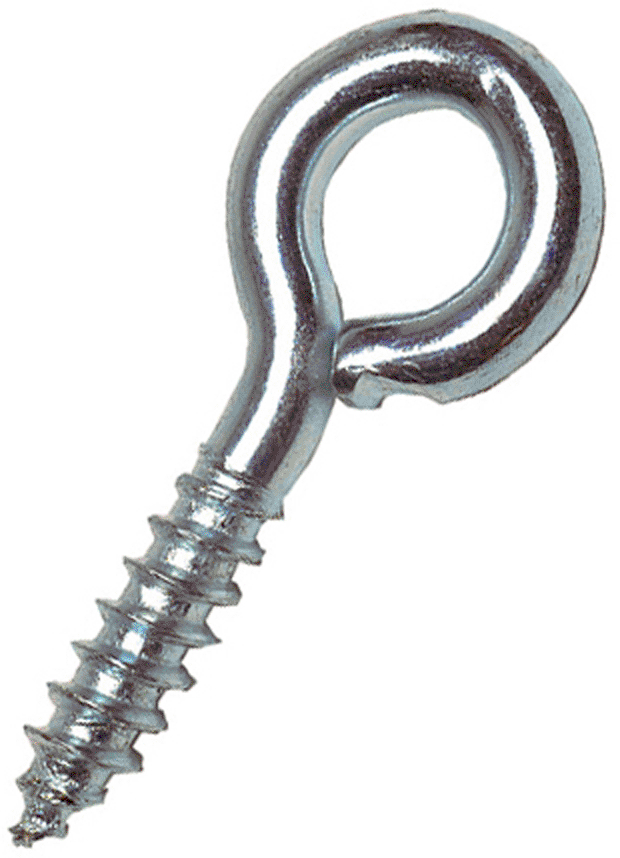
Eye Screw: open versions are called cup hooks.  Hang all sorts of stuff… what else can I say.


Tamperproof and tamper resistant screws

A special type of screw, used to prevent theft and tampering, with a very nonstandard head type that can only be screwed on and unscrewed with a special tool, designed specifically for the specialty screw head.

Decorative Screws


Made to look like old-fashioned wrought-iron nails, forged rivets, or any number of other attractive or unusual heads, these can take your project and add a special touch of antique, rustic or handcrafted to make it extra special and unique!  I want some of these :)


Confirmat Screws

A European-style, special tapered screw (requiring a special countersink drill bit for the pilot holes) is designed to create a very strong and stable joint between two pieces of MDF (medium density fibreboard) or particleboard.  I bought mine as part of a kit at McFeelys.


Another screw that will work well with MDF (and is less expensive than the Confirmat screws) is a coarse drywall screw.


How to Avoid Splitting Wood

Before screwing, drill a pilot hole.  That a hole drilled with a drill bit the same diameter as the shank, or body (minus the threads) of the screw.

** Try rubbing bar soap on the screw threads.  This will lubricate the screw going in, and can help reduce the chance of splitting.


Resources

10 Uses for Drywall Screws

Wood Screws

How to Avoid Splitting Wood on a Project


Future posts :

pocket screws and jigs

bolts

nails

miscellaneous fasteners

Ummm…. I would try to be funny about screws, but I don’t want to get in trouble with the search engines (and my mom ;)… so what do you… uh, fasten. 


New to Pregnant with power tools? Don't miss a post and subscribe here... Bookmark and Share

Cool Tools: Pneumatic Nail Gun


The pneumatic nail gun is the most common and most powerful nailer, and use a small air compressor and air pressure to power a piston which in turn drives the nail into your material.

They are easy to use with a little practice. 

They are also pretty expensive (especially when you also have to buy an air compressor. However, if you have a project that will use a lot of nails it can really be worth it, because it will save a ton of time, bent nails and banged up wood.
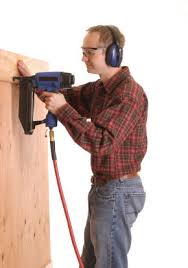
 

photo from Life123

For the combination of power and productivity, a pneumatic nailer is a must-have if you plan to do any serious building, such as but not limited to building a deck, gazebo, shed, addition, pergola, or even a fence.

Finally, the most important thing to know before buying or even considering a pneumatic nailer, know what you will be using it for.  The gun you get depends on what you will be using it for.  Longer thicker nails need stronger guns.

In order of power:

Brad Nailer: 18 gauge nails, up to 2” long.  Good for hobbies and crafts (jewelry boxes, birdhouses).

Finish Nailer: 15 / 16 gauge nails, up to 2.5” long.  Good for moldings, trim, beadboard and other medium-duty decorative elements.

Specialty:  Flooring nailer for installing hardwood floors and roofing nailer for roofs.

Framing Nailer: these are heavy-duty construction guns and will be a must-have if you are building a deck or an addition to your house.


photo (Nail Gun Extension Lets You Work Standing Up) from ToolMonger


Considerations

Air Requirement: each nailer has a specific range of air pressures  (psi: pounds per square inch) and air volumes (cfm: cubic feet per minute) required to work.  Make sure that compressor provides the minimum air pressure and quantity to work with your nailer.  And make sure your air hose is the right size and length.

Type: stick or coil.  Stick nailers take nails that are held together to form a “stick”.  The “sticks” are usually 20-40 nails long.

Coil nailers take magazines or coils of nails up to 300 nails long.

Weight: A heavy gun will absorb the kickback well, driving your nail in more deeply, but will also be tiring.

Trigger: single-nail with a trigger pull is the safest.  But you can also get models that rapid-fire (2 nails per pull), or nailers that nail on the “bump”, nailing every time the head of the gun comes into contact with something (meaning anything).  Some models will let you switch between some of these trigger styles, so you can start of slow until you get the “hang of it”.

Tool-less Adjustments: New models usually will not require tools to adjust the nail depth or for unjamming nails.

Nail Depth Adjustment and Nail Size Adjustment:  These particularly matter if you will be using many sizes of nails on a project.

In addition, an air compressor is heavy and expensive.  The set up is not as portable as cordless, but is more powerful, and a gas-powered compressor will also not depend on having an electrical outlet nearby.  Though it is expensive, a serious DIYer will have other uses for an air compressor (particularly cleaning tools and work areas).

If you are using a pneumatic nailer for outdoor work, skip the electrogalvanized nails (they just won’t last as long), use stainless steel.

Finally, make sure you can easily find nails for the gun you are interested in.

photo from Charles & Hudson


Safety

The safety considerations for the pneumatic guns are the same as for the electric nailer.  Always wear safety goggles, and watch your hands (and feet!).

In addition, use the proper air pressure specified for your tool, and always disconnect the air hose before removing a jammed nail or doing other servicing tasks.  You don’t want to pull out the jammed nail and find the next one in line sticking out of your hand (if you are lucky)!

Most of all: Be careful, and pay attention.

Here’s a few resources for pneumatic nail safety.

http://www.taylorrental.com/tip_detail.asp?id=70&sec_id=Homeowner


Purchase

Pneumatic nail guns range in average price around $175-275.  I don’t feel qualified to tell you which models are the best (check back in May :), but here is a good source.

So if you are planning to build a deck (I hope to be building a deck and pergola next spring), a pneumatic framing nail gun is a smart idea to save you a ton of time and energy.

If you will be only installing molding, trim, panels, beadboard, or doing small craft projects, than the choice is yours… Pneumatic nailers can drive 18 gauge finish and brad nails up to 2” long (longer than the average electric nailer).

Finally, even if you won’t be buying or using a pneumatic nail gun, you may want to choose a contractor that uses a pneumatic nail gun.  A pneumatic nail gun saves a lot (a lot!) of time (which also saves money), and usually makes for a more productive contractor.  Which one do you prefer? 


Additional Resources

Can’t say it better than this.  Using an Air Nailer: 10 Easy Steps

3 Best Pneumatic Framing Nailers

Ins and Outs of Pneumatic Nailers (details!  Maybe more than you ever thought to know :)


New to Pregnant with power tools? Don't miss a post and subscribe here... Bookmark and Share

Cool Tools: Electric Nail Gun

Why they are awesome

Basically, a nail gun will make nailing faster and better looking.

  • Saves a lot of time: is quicker and more precise than a hammer.
  • Won't leave ugly marks like a hammer can.
  • Will automatically sink your nail making it fast and easy to hide.
When purchasing a nail gun for DIY projects and hobbies, you have a lot to choose from: electric, cordless, and pneumatic.

I’ll look at pneumatic nail guns another time… this post will be about the electric nail gun.

P8290020

Why electric?

Because they are the simplest, working with your household electricity, and I just got one for my birthday  :)  

Electric nail guns aren’t as powerful as pneumatic, but they are very convenient and affordable.  They are also quieter and don’t require oiling, two additional pros in my opinion.

Finally, cordless battery-operated nail guns are really expensive but I have heard that they are more powerful than the corded variety (which is a surprise).   
Do you use a cordless nail gun?  Does it work for you?

I’m going to focus on the electric nail guns that use brad and finish nails.  These usually only work with nails up to 1-1/4 inch long.  These electric nail guns are for light DIY.

In addition to driving thin nails deep where they can be easily hidden, these kind of nail guns have a padded contact foot that leaves no marks behind on the surface being nailed.

They are also usually smaller than other kinds of nail guns allowing them to be easily used in tight spots.

An electric nail gun is useful for
  • installing trim and molding
  • furniture building, cabinetry and making bookshelves.


Current Matters

Electrical power (current) is the key to the electric nail gun, and reviews often (really often) complain about underpowered guns, nails not going in all the way, and the gun quitting on them.  

Sometimes this is because the electric nail gun really isn’t as strong as you need (for example, MDF is very dense and you may not be able to nail through two sheets of MDF with an electric nail gun).  The higher amperage rating of the gun, the stronger it is.

Other times, it is because the user is not providing enough power to the tool…

Amperage.  Avoid using an extension cord, or use a heavy-duty (12 gauge) cord.  
Super simplified, amperage is the quantity of electricity an appliance uses.  It is important to provide the nail gun with the amperes it needs.  Household current will be strong enough to power your nail gun, but not if you use an extension cord that isn’t rated for the tool you are using.  The length of the cord matters too, since the current weakens over distance.  You must read this if you use power tools and extension cords (and who doesn’t?), it will change your life.

There is one more important factor…

Force.  The weight and strength you put behind the nail gun.
I laid my bookcases on the floor and placed my body weight directly over the gun to drive the nails entirely into the bookcase.  The more force (weight and strength) you can put behind the gun will  affect how deeply you can drive the nail.

P8290013

Purchasing ($30-$120)

When buying any kind of nail gun, there are many important features to consider.

Power: Check the amperage requirement of the gun before you buy.  This is the best indicator of how strong the gun is, how deep it will be able to drive nails, and the hardness of the materials it will be able to handle.  My Arrow ET200 is 14 amps and handles soft and hardwoods very well, and even manages MDF well (provided I’m putting serious weight behind the gun).

Power Cord Length:  Because the electric nail gun won’t work as well attached to an extension cord, the length of the power cord is important.  Mine is 6 feet long, and I think it is too short.  10 feet would be much better.

Comfort: Get the lightest gun that still has the power you need.  Hold it in your hand.  If you’re like me and have small hands, this will be even more important.  Many nail guns are designed for men’s larger hands.

Nail Sizes:  You’ll get more use out of a gun that works with many different nail sizes.

Loading: Nail guns will use either strips of nails or a continuous coil of nails.  Strips are sometimes higher capacity, while coils will be able to handle nails with large heads.

Safety:  Most nail guns now come with sophisticated safety features.  Even so, they are one of the most dangerous power tools (tied with table saws).
  • dual-contact mechanism to prevent accidental firing
  • sequential firing mechanism is even safer, requiring the trigger be released before the gun is enabled to fire again
Extra features to look for are:
  • ability to adjust the depth that the nail is placed
  • ease of taking apart gun to remove a jammed nail

Safety Tips

  • always wear safety glasses and ear protection
  • unplug the gun before loading nails or removing nail jams
  • be certain that the nail you fire will not go all the way through the wood or wall and hurt you or someone standing on the other side
  • be careful that the gun (if it’s a very powerful one) won’t kickback and smack you in the face
  • hold the gun firmly and steadily, a slip could result in injury
  • use the proper nail for your gun and do not use rusty nails
  • don’t nail into the wall where there is electrical wiring
  • Keep out of reach of Children

Tips and Tricks and other Resources

Some nails are coated (labeled CC) with an adhesive that melts from the force of the nailer, making it easier to drive into the wood and then making the joint that much stronger.

The general rule – the nail should be 3x the thickness of the material you are nailing.  Choose the right brad nails for your project.  The differences between brad and finish nails.

Angling nails:  line up the gun with the angle you want the nail to take (point slightly toward the side that won’t be seen, so if the nail does pop through it won’t be seen).

Nail that has popped through:  Cut the protruding nail off with wire snips and use a nail set to hide the rest.

Avoid splitting:  with finish nails (15 or 16 gauge), keep nails 2 inches away from edges.  With brad nails (18 gauge), you can put nails as close as 1/2” from the end and 1/8” from the edge or just
use brad nails (the thinner nails) to finish near corners, because they are much less likely to split the wood than a finish nail.

Nails that stick out: even with the best nail guns, some nails won’t be driven all the way in.  If it stick out more than 1/4” cut it off with side-cutting pliers.  Otherwise use a hammer and nailset to hammer it the rest of the way in.

I know many of you love your nail guns… which nail gun do you have?


New to Pregnant with power tools? Don't miss a post and subscribe here...
Bookmark and Share

Cool Tools: Workshop Helpers, part 1

If you are going to do a job, it pays to plan ahead, prepare your workspace materials and tools and do the job right the first time.

Especially if it’s a job with expensive materials, or meant to be a permanent part of your home – like the built-in bookcases I’m working on right now.

P8150052 P8150053


So I thought I’d share with you some of the little “workshop helpers” that can make a huge difference on a project, and many can be made easily yourself.

Especially if you are working alone, the “helpers” can make a difficult task much easier!


Assembly Blocks

This assembly block is quick and cheap to make out of scrap materials!

P8140003

Besides helping to ensure that my bookcase corners are square, it is like an extra set of hands!  After placing the MDF into the block, the boards stay in place, allowing me to grab my glue, drill and screws before squaring everything up and adding the corner clamp to the top.  I like using both the assembly block and corner clamp to hold everything in place!

P8140018 

I just used glue and screws on some scrap pieces of wood.  Make sure you set it up square with representative pieces of your material (3/4” MDF for me) before you glue and screw it all down.

Drilling Template

I need to whip one of these up out of acrylic or scrap wood, but a simple piece of paper works too!  I’ve marked on the paper where my pilot holes need to be drilled.  Then I just use an awl, pen or the tip of my drill bit to mark the wood before I drill.

P8150046 P8150054

Because MDF “blows out” so easily, it is really important to make sure your pilot holes are drilled into the middle of the board edge!  Without this guide I’m sure I would’ve put a hole to close to the edge!  This is also a useful tool if you want all your pieces to look uniform.

Something similar works wonders when attaching cabinet hardware.


Sawhorses

See this post for instructions on building your own DIY adjustable height storage sawhorse.

P8080010


Ripping and Cross-cut Table and Rip Fence

Not everyone will need an extra large surface for their table saw.  But since I’m using 4x8 foot sheets of MDF I needed this badly!  The instructions for the table and rip fence are here.  I also have a foldable table placed behind the saw to catch the output.

With the saw in this position, I can rip this long sheet of beadboard.  I just cut along one of the “beads”, but I could also have used my 8’ circular saw rip fence and some clamps as a guide.

For trimming off that extra inch, I use the table’s metal rip fence.

P8150037 P8150028
P8150031 P8150036
Ripping

With the saw in this position, I can cross-cut my beadboard to fit the height of my bookcases. 

P8150040 P8150038
P8150043 P8150042
Cross-cutting

There are a few problems with this enormous table.  My saw is on its own stand, so the saw and the table move independently – this is very bad when using the 2x4 rip fence – the cuts can be inaccurate.  I have been pretty lucky and all my cuts have been fine, but if accuracy was really important, I would find a way to firmly attach the table to the saw and minimize the movement.

Also, the on/off switch is hard to reach.  This is a huge no-no as it can be dangerous.  I plan to built an emergency push bar stop that extends out past the edge of the table. (I’ll share that with you when it’s finished!)

This is only a tiny subset of the “workshop helpers” that you can use… there’s sure to be a few more posts like this one in the future!


New to Pregnant with power tools? Don't miss a post and subscribe here...
Bookmark and Share
Related Posts with Thumbnails