3:15 PM
|
by Christin@Pregnant with power tools
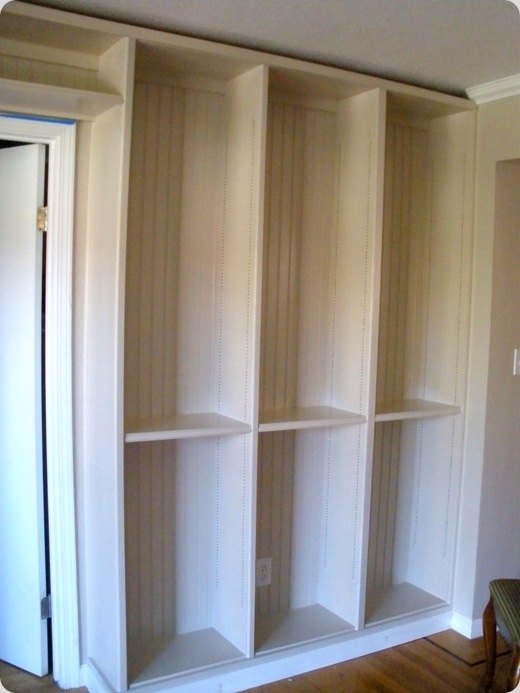
So here’s what my bookcase is looking like today…
It’s almost finished.
I need a few more shelves… that is priority #1. Oh and putting the crown molding up would be smart too ;)
Finally, I’d like to build some cabinet doors for the bottom half (I made some of my own trim – so I think this will be a fun challenge too), but there’s no rush (which means it’ll be months before I get to it!) It doesn’t have to be perfect.
Still, I think it’s gorgeous, even unfinished and with half my books and knick-knacks just thrown willy nilly on what shelves I do have.
I can’t wait to dress the shelves with a more esthetic appeal!

New to Pregnant with power tools? Don't miss a post and
subscribe here or

2:45 PM
|
by Christin@Pregnant with power tools
Latex paints, particularly gloss and semi-glosses have poor print resistance.
They dry soft, and anything that presses against the paint leaves an impression.
This is particularly problematic for bookcases.
I painted my cases with an interior acrylic latex semi-gloss to match my wall color. As it is, it would have very poor print resistance… but it can be helped.

I top-coated my paint job with 3 coats, sanding between coats, of Minwax Polycrylic, which dries to a clear, hard, print resistant finish.

If you are painting a bookcase, and want to avoid fusing with final coats of polycrylic , a good alternative would be Kelly Moore’s DuraPoxy paint which also dries to a hard, print resistant finish.
New to Pregnant with power tools? Don't miss a post and
subscribe here or
7:00 PM
|
by Christin@Pregnant with power tools
** Don't forget to enter the $65 CSN Giveaway before the end of Sunday!!
So I’ve been putting together the shelves for my bookcases this week!
This can be easy or hard, cheap or expensive, depending on your preferences.
The key is to avoid sag.

the wood whisperer
Most materials will sag at least a tiny bit under heavy books, and your eye is able to detect a sag of just 1/32” per foot!
The coolest website to utilize to avoid this catastrophe… The Sagulator. An online calculator that takes material, load, dimensions, edging, method of attachment, you name it, into account to determine the amount of shelf sag (or deflection) you will get. This is a seriously fun calculator to play with!
You want a sag of no more than .02” per foot.
Here are some handy numbers for you!
Hardback books (9x11): weight ~ 20 pounds per foot,
magazines of the same size weigh ~ 42 pounds per foot!
I copied this shelf weight limit chart from a Woodworking magazine for you… The numbers on the right are the pounds per foot the shelf can handle before showing sag (for shelves 11 inches deep).
| Type | | | Length | |
| Species | Thickness | 24 in. | 30 in. | 36 in. | 42 in. |
| Red Oak | 3/4” | 49 | 21 | 9 | 5 |
| w/ edging | 116 | 47 | 23 | 12 |
| Poplar | 3/4” | 42 | 17 | 8 | 4 |
| w/ edging | 97 | 39 | 20 | 10 |
| E. White Pine | 3/4” | 33 | 14 | 6 | 3 |
| w/ edging | 76 | 32 | 14 | 8 |
| Fir Plywood | 3/4” | 32 | 13 | 6 | 3 |
| w/ edging | 96 | 39 | 18 | 9 |
| MDF | 3/4” | 9 | 4 | 2 | 1 |
| w/ edging | 73 | 30 | 14 | 7 |
My shelves are 19 or 24 inches wide, made from 3/4” thick MDF with hardwood edging on front and back. I bought some 1x2s and routed a 3/4” wide rabbet for the back of each shelf. I also bought some nice decorative top cap molding that I used as a front edge for each shelf.
I’ve discovered that my shelves will have very little sag, even with heavy hardcover books on them. Whew! I’m glad.
But what aspect of my shelf has the biggest impact on sag? I checked the sagulator.
Basically, hardwoods sag less than MDF or plywood. I would have guessed that adding hardwood edging to my shelves helped them the most, but it's not the only factor.
One thing that made a big impact was thickness of my MDF… even 1/8” thinner = much more sag!
My shorter shelf width helps them sag less too (it is best to keep shelves under 30” wide, if possible).
So now I know, and next time I build shelves I’m checking the sagulator again!!!
New to Pregnant with power tools? Don't miss a post and
subscribe here or
5:45 PM
|
by Christin@Pregnant with power tools
We all make mistakes.
But hiding woodworking mistakes doesn’t have to be hard.
Worst-case scenario: you have to cut off the bad part and use the lumber somewhere else.
Other times a careful placement, trim or wood filler, caulk or spackle will do wonders!
Here are some of the mistakes I made while building my bookcases…
The lumber slipped on the table saw and got gouged
 |  |  |
| fill with wood filler | and sand | |
Molding cut too short
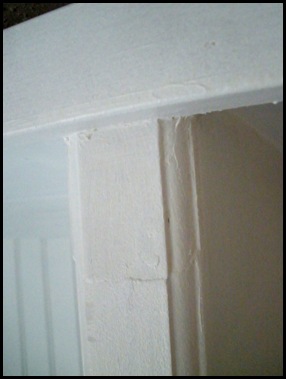
Cut a bevel into the end and a short add-on piece and splice them together.
Enormous gaps
 |  |
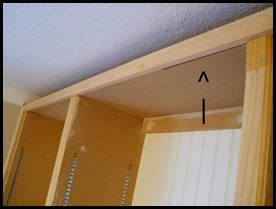 | 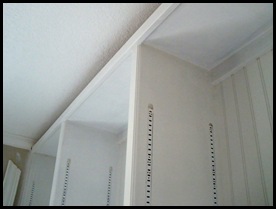 |
| use multiple layers of caulk | – smooth after each application |
I started making the wrong angle cut in the baseboard.
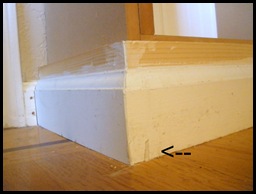 | 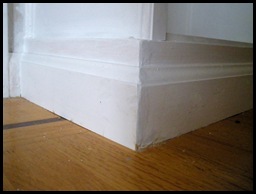 |
| tried caulk, but wood filler | worked better (needs more paint) |
Nail holes
 |  |
| use wood filler to fill and | then sand. |
I guess I should figure out when you should use caulk and when to use wood filler or putty (and then share that info with you!)
New to Pregnant with power tools? Don't miss a post and
subscribe here or
6:59 PM
|
by Christin@Pregnant with power tools
Since this bookcase is inexpensively built from MDF, the hardwood trim is key to making it look more expensive and well-put-together.
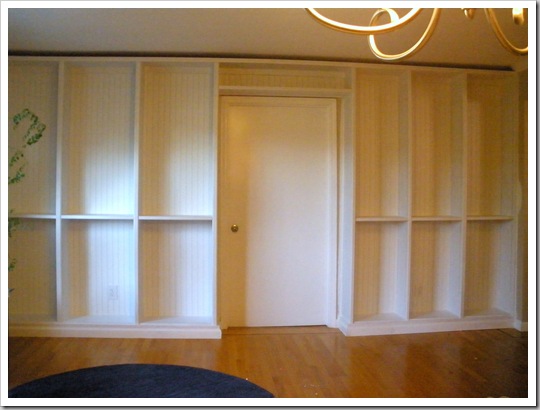
The trim hides the gaps between the cases, and along the wall, ceiling and base.
I used mullion between the cases (and even made some of my own) .

The key is to use solid wood (plain or with a decorative edge) to cover the edges of the MDF, and frame the bookcases against the wall and ceiling.
I used a 1x2 (3/4”x1-1/2”) along the left wall, and a piece of stock ripped to 3/4”x3/4” along the right wall where there was a tighter fit.
I used quarter round between the wall and the door surround. On one side the gap was too deep for quarter round so I used shoe molding which is like a quarter round molding that’s been elongated .
I used boards ripped to 4-1/2” wide to cover the bookcase bases. My baseboards were then nailed to these boards.
Finally, I nailed two long 1x2 boards along the top of the bookcase. My crown molding will be nailed to this to complete the look!
All the trim is done, the cases have been primed 2 times. The only things I have left to do is build the shelves, install the crown molding and build and install the cabinet doors to the bottom half.
New to Pregnant with power tools? Don't miss a post and
subscribe here or
8:33 AM
|
by Christin@Pregnant with power tools
I’m sorry this project is taking forever (really, really sorry – you have no idea!)
I got all the cases into place, and started putting on the trim, finished one half of the room, and ran out…
I chose mullion molding (normally used to create panels in windows), because I wanted something more ornate than plain 1x2s, I wanted something a little wider (1-3/4 inches instead of 1-1/2).
I went to 5 (5!) hardware stores but couldn’t find anymore – they just didn’t have anymore (someone must be doing a serious window project!)
The trim is important because it hides the front edges of the cases (MDF edges are not pretty so best hidden with hardwood),
and there’s a gap between the cases too, so this was a must!
So I made my own mullion.
With my router (and roman ogee bit) and some 1/2 inch hardwood ripped to width.
This turned out even better, because on this side of the room some of the gaps were wider or narrower, so I could make 1-1/2” or 2” mullion (for perfect fits!)
I thought I saved time by buying my mullion, but now I’m glad I made my own (I wished I had done this for both sides!- My mullion molding looks way better than the store-bought stuff!)
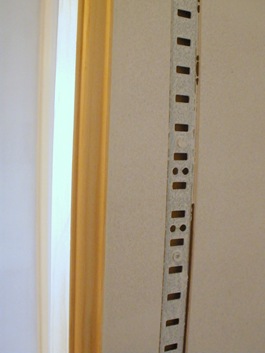 |  |
| My Molding | Store Molding |
The cases are now primed and the project is back on track!
New to Pregnant with power tools? Don't miss a post and
subscribe here...
 Email Updates