1:47 PM
|
by Christin@Pregnant with power tools
I'm so excited to announce that
I won The Design Confidential's Hyloft Giveaway!
(I never win anything - seriously).
Hyloft has awesome storage solutions, and it isn't just for garages. I probably won't put my new shelves in the garage... I can't wait til it gets here so I can get my organizationing going! I'll be sure to share!
Anyway, the weekend was crazy, so
Cool Tools will be back next Monday! Here's a hint: I've been using
my new table saw (and it
Rocks!!!)

New to Pregnant with power tools? Don't miss a post and
subscribe here...

6:00 PM
|
by Christin@Pregnant with power tools
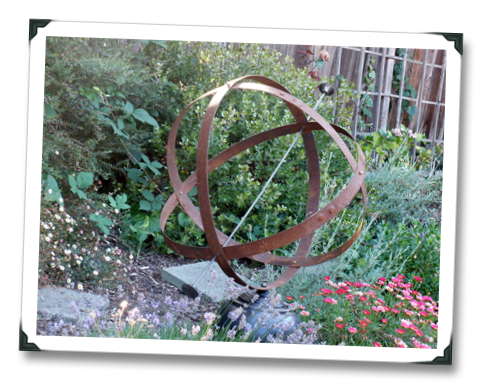
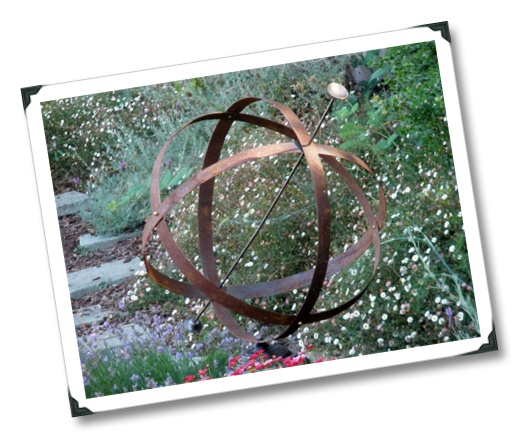
This armillary is built pretty much the same way as this one. The secret ingredient is barrel hoops!
You may be able to find a local source, but I bought mine from Kentucky Whiskey Barrels for $6 each (shipping was $16). Specify that you want all 3 (more or less is up to you) to be the same diameter. Mine came about a week later, 3 gorgeous rusty hoops about 24” across.
In addition to the hoops, you will need a few items easily found at your local hardware store.
metal rod, threaded #8-32 (thread type used for most knobs), 3 feet long
hollow metal tube, steel or aluminum (aluminum cuts easier but is harder to find), that fits over the threaded rod, 3 feet long (or 3, 12” long pieces)
2 knobs
bolts, size #8-32, 3/8” long (longer if you are using more than 3 hoops)
#8-32 ball nuts (lighting section)
#18 or 11/64” drill bit
The following is for the base (which is optional)
Heavy planter in the color you want or unglazed so you can paint it
Lamp canopy, spacer (I used something called a “vase cap”), a long lamp nipple and a lamp finial (lighting section)
large washer (3/8" opening) and lamp hex nut
3/8” drill bit
To attach the rings together:
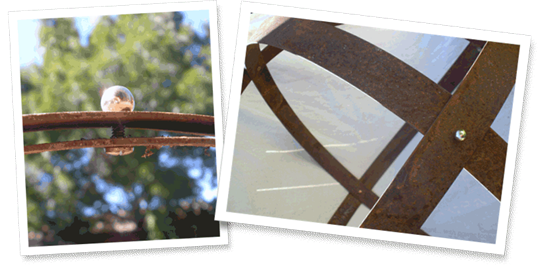
Drill a hole (11/64" bit) through both hoops. A standard drill bit will work just fine on metal (it only takes longer).
Bolt together with #8-32 bolt (3/4” long) and #8-32 ball nut
Repeat on the opposite side
Start with two hoops and attach them at right angles. Follow with the third ring. It’s just like this tutorial only with metal.
To add the arrow:
Choose which rings will have the arrow and do not bolt them after drilling.
Cut the metal tube to the diameter (width across) of the hoops.
Place your threaded metal rod through one of the holes.
Slip the hollow tube over the rod and the rod through the other hole.
Cut the remaining tube for the lengths you want on either side of the sphere.
Slip them over the rod and screw the knobs onto each end.
 Tape off the sphere and Paint the arrow. I used Dark Bronze Hammered Spraypaint from Rustoleum.
To attach to base:
Determine the angle you want the armillary to be at roughly – sorry this armillary won’t work well as a sundial – it flexes too much on its base to keep an accurate angle.
Drill a hole (with the 3/8" size drill bit) where you want to attach to base.
Attach to base in the location where the armillary will sit in the garden. It’s heavy and will flop around in an irritating way if you need to move it, so avoid too much moving.
Place the washer and nut on the lamp nipple and push them through the hole in the pot.
Then holding the nipple steady from inside the pot place the lamp canopy, vase cap, and armillary sphere on the nipple (a second set of hands is important here).
Firmly screw the ball cap onto the nipple to hold everything together and tighten as much as possible.

If the planter isn’t heavy enough to hold the armillary, you can pour concrete into it (just remove sphere, and turn it upside down with the nipple in proper position). Attach sphere again 3 days later after concrete has cured.
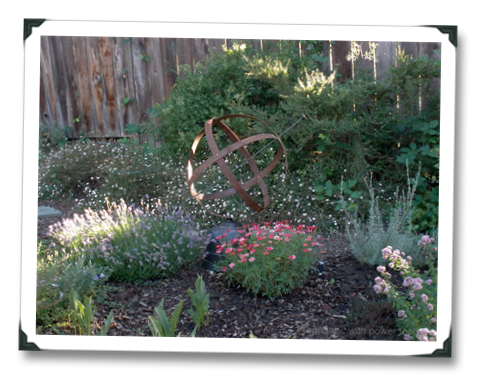
Viola! It is a perfect addition to the garden and my mom really loves it. She also has a very nice garden to start with.
See what I mean…
I hope you get inspired to try this out yourselves.
Drilling through these metal hoops was easier than I expected – it just takes a little longer than wood. Also I love my Dremel and it’s metal cutting wheel! I was quickly able to cut my metal tubing to fit the arrow! Here’s my post for more information on using a Dremel for metal cutting
.
New to Pregnant with power tools? Don't miss a post and
subscribe here...
I'm linking this post up with:


 Email Updates